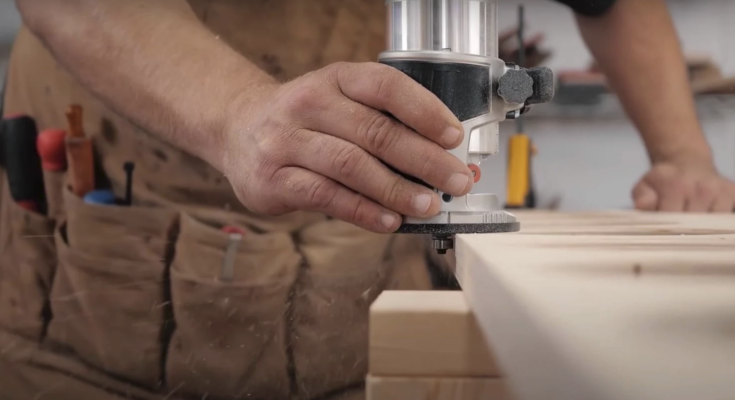
A router is an essential tool for smoothing and refining rough cuts in woodworking, whether you’re working with plywood, hardwood, or composite materials. Rough cuts from saws can leave uneven edges, tear-out, or splinters, which can be challenging to clean up manually. With the right router bit and technique, you can achieve clean, professional-looking edges in no time. Here’s how to do it properly.
1. Choose the Right Router Bit
The first step in cleaning up rough cuts is selecting the appropriate router bit for the job. A flush trim bit with a bearing guide is ideal for following a template or straight edge, while a chamfer or round-over bit can help soften sharp edges. If you’re working with rough saw cuts, a straight bit with a guide fence can smooth out imperfections efficiently. For highly detailed work, spiral bits provide cleaner cuts with less tear-out.
2. Secure Your Workpiece
Before routing, ensure your workpiece is clamped securely to a stable surface. Unsecured material can shift during routing, leading to uneven cuts or potential safety hazards. Use clamps or a non-slip router pad to keep the workpiece from moving. If using a template, double-sided tape or clamps can hold it in place while guiding the router along the edge.
3. Use the Right Router Speed and Direction
Adjust the router speed based on the material you’re working with—higher speeds for hardwoods and slower speeds for softer woods. Always feed the router against the rotation of the bit (called climb cutting) to maintain control and prevent tear-out. If removing a lot of material, take multiple shallow passes instead of one deep cut to reduce strain on the router and prevent burning.
4. Follow a Guide for Precision
For straight edges, use a router fence or edge guide to keep your cuts accurate. When refining curved edges, a bearing-guided flush trim bit or a template is your best bet. Running the router smoothly and steadily along the edge will ensure a clean, professional-looking finish. If you encounter burn marks or rough spots, a light sanding with fine-grit sandpaper will remove any imperfections.
5. Final Touches and Safety Tips
After routing, inspect the edge for any minor imperfections. Sand the edges lightly with 220-grit sandpaper to smooth out any remaining rough spots. Always wear safety goggles, ear protection, and a dust mask when routing, as wood chips and dust can be hazardous. With patience and the right technique, you can turn rough, uneven cuts into smooth, polished edges that look professionally finished.
Using a router to clean up rough cuts not only saves time but also ensures precision and quality in your woodworking projects. With practice and the right tools, you’ll achieve clean, sharp edges on every piece!


