There are many reasons you might need to remove a single tile, whether it’s cracked, stained, or simply out of place. The process requires care to avoid damaging surrounding tiles, but with the right tools and techniques, you can complete the task efficiently.
Tools and Materials Needed
Before you begin, gather the following:
- Safety goggles and gloves
- Hammer and chisel (or a putty knife)
- Utility knife
- Drill with a masonry bit (optional)
- Grout saw or oscillating multi-tool
- Tile adhesive or thin-set mortar
- Replacement tile and matching grout
Step 1: Protect the Surrounding Area
Start by covering any nearby surfaces to protect them from debris. If you are working near walls or countertops, use painter’s tape to avoid scratches.
Step 2: Remove the Grout
Using a grout saw or oscillating tool, carefully remove the grout around the damaged tile. Take your time to prevent damage to adjacent tiles. If the grout is soft, a utility knife may also work.
Step 3: Loosen the Tile
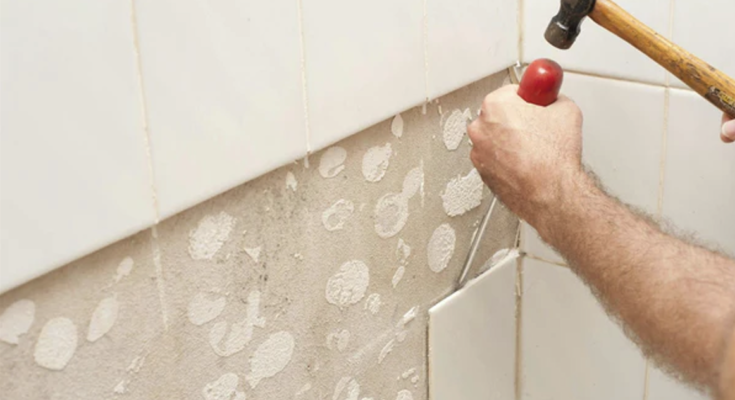
Once the grout is removed, you need to break the tile free. One method is to drill a few small holes in the center of the tile using a masonry bit. This weakens it and makes removal easier. If you don’t have a drill, you can carefully tap a chisel with a hammer at the center of the tile to create cracks.
Step 4: Remove the Tile
Insert a chisel or putty knife into the cracks and pry up the tile pieces. Start from the center and work outward to avoid prying against intact tiles. Be patient—rushing this step can cause unnecessary damage.
Step 5: Clean the Surface
After the tile is removed, scrape away any leftover adhesive or mortar using a chisel or putty knife. Vacuum the area to remove dust and debris.
Step 6: Install the New Tile
Apply a thin layer of tile adhesive or thin-set mortar to the cleaned surface. Place the replacement tile, pressing it firmly into position. Use tile spacers if needed to ensure proper alignment.
Step 7: Reapply Grout
Once the adhesive sets (typically 24 hours), fill the gaps with matching grout. Wipe away excess grout with a damp sponge and let it dry completely before using the area.
By following these steps, you can efficiently replace a single tile while maintaining the integrity of your flooring or backsplash.


